Home Assistant via Zigbee
ZiggyMeter joins Home Assistant's ZHA integration as an ordinary Zigbee device. There is nothing to install: the device exposes standard ZCL clusters, so ZHA creates entities for energy, power, voltage, current, temperature and battery on its own.
Pair it the usual way — see Zigbee setup for the device side, and ZHA's Add device for the Home Assistant side.
This page covers the parts that are not automatic: an optional custom quirk, and firmware updates.
Custom quirk
A ZHA quirk for ZiggyMeter is published at github.com/ziggymeter/ziggymeter-zha-quirks.
It is optional — the device uses standard ZCL clusters and works without it. Install it if you want ZHA to present the device the way the quirk defines rather than the way ZHA infers it from the clusters.
Quirks are loaded the standard ZHA way: put the file in the directory named by custom_quirks_path and make sure enable_quirks is on, both shown in the configuration.yaml below. Restart Home Assistant afterwards, then re-pair or reload the device so the quirk is applied. See the repository for what it provides and for any version requirements.
Automatic firmware updates
Home Assistant can check for new ZiggyMeter firmware and install it over the air. This assumes the default ZHA integration with the zigpy backend.
1. Add the firmware provider
Edit Home Assistant's configuration.yaml and add an ota section to zigpy_config:
zha:
    database_path: /config/zigbee.db
    enable_quirks: true
    custom_quirks_path: /config/zha_quirks/

    zigpy_config:
      ota:
        extra_providers:
          - type: zigpy_remote
            url: https://fw.ziggymeter.com/zigpy_index.json
Restart Home Assistant to apply the change.
2. Initial state
On the device page in Home Assistant, find the Firmware sensor.
- It initially shows
Up-to-date— at this point Home Assistant has not yet checked the server. - Selecting the sensor shows the installed version and the latest version, taken from the downloaded version attribute.
- Update and Skip are disabled until a newer version is known.
3. The upgrade
Home Assistant checks periodically. When a newer version is found, Update and Skip become available.
Choose Update to start. The firmware transfers while the device stays operational; once the transfer completes the device reboots. Confirm the new version in the Firmware sensor.
WARNING
Zigbee OTA is slow — the file moves in many small chunks over a low-bandwidth radio link. Plan for hours, keep the device powered, and keep it in range. If it stalls, improve the radio link rather than restarting repeatedly.
Forcing a check
Home Assistant decides when to look for firmware. To trigger a check yourself:
With the ZHA Toolkit plugin — install Zigbee Home Assistant Toolkit, then open Developer tools → Actions, choose Trigger Device's Firmware Update, select the ZiggyMeter Firmware sensor as the Device Reference, and select Perform action.
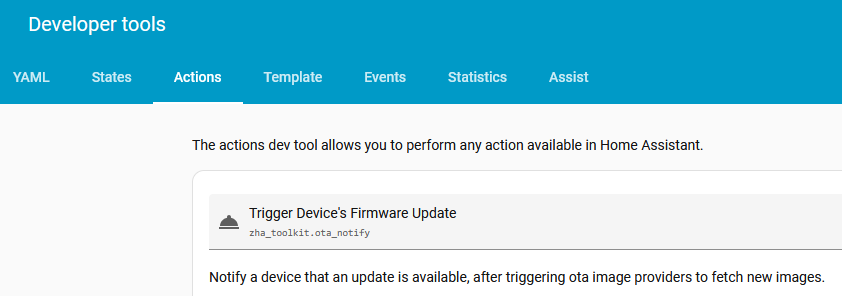
Without extra plugins — send the Zigbee image_notify command on the OTA cluster. Open the ZiggyMeter device page, select Manage Zigbee Device, choose the OTA Cluster, then under Commands select image_notify (id: 0x0000) and supply the parameters.
What you get
The entities ZHA creates come from the clusters listed in Integrations → Zigbee. Expect summation delivered and received, active power, RMS voltage and current, device temperature and battery level — subject to what your meter actually reports.
INFO
A value that stays empty usually means the meter does not provide it, not that the Zigbee link failed. A single-phase meter has no phase B or C values.